Monday, July 29, 2013

Fricassée de Poulet à l’Ancienne and Crème au Beurre, Ménagère

“For this traditional Sunday dinner dish, which is not difficult to execute, the chicken pieces are turned in hot butter, sprinkled with four and seasonings, then simmered in wine and white stock.” Julia and her co-authors explain that a fricassée is between a sauté and a stew in that the meat is first cooked in butter and then simmered in liquid. This particular version recommended serving whole mushrooms and onions along with rice or noodles with the cream sauce.

Parsley, thyme, bay leaf
I am still working on my chicken dissection skills and am improving with most of the carves but still struggled with disjoining the legs from the rest of the body. Once the young fryer made its way into about eight pieces, I lightly cooked sliced onions, carrots, and celery in a large casserole and then added the chicken. The chicken needed to be turned every few minutes so that it became only “lightly golden yellow” on each side. After several turns, it was sprinkled with flour, salt, and pepper and then continued to cook for a few minutes on low heat. Then the liquids – stock and wine – were added along with an herb bouquet that included parsley from my garden. Side note: I think these herb bouquets are lovely and would like to see them as a more ecological substitute to flowers at weddings. The chicken then simmered for about 30 minutes until it was cooked through.

Cosy in the casserole

Failed flutes
In the meantime, I prepared the onions and mushrooms. The cross-reference for brazed onions (oignons glacés à blanc) calls for small white onions to be peeled and simmered slowly in butter, white wine, salt, pepper, and an herb bouquet for 40-50 minutes. Simple enough. The stewed mushrooms (champignons à blanc) are cooked so that they maintain their white color. MAFC recommends fluting the mushroom caps in a lovely decorative manner. I couldn’t quite get my knife to work the way the authors describe, but the mushrooms managed to have some texture. The mushrooms were then placed in boiling water, salt, lemon juice, and butter for five minutes.

When the chicken was finished cooking, it was removed from the casserole and the cooking liquid was boiled down. The recipe called for whipping cream to be beaten with egg yolks, but I forgot to buy cream and had to substitute skim milk which seemed to work just fine. The hot liquid was slowly added to the eggs to temper them and then the mixture was returned to the casserole dish and continued to boil down. A little salt, pepper, lemon juice, and nutmeg and the sauce was ready to strain and have the enrichment butter.

Couldn't resist another "ingredients in the kitchen" shot
I used the same steamed rice technique from a few weeks ago but without the addition of mushrooms. The whole dish was served on a platter with the chicken over the rice and garnished with mushrooms and onions and covered in sauce. I understand that aromatics that are cooked with the meat are not usually served, but they are so delicious I can’t help but nibble on them anyway so I placed them on the plate for color and extra flavor.
Bountiful platter
Plated dish
I had additional ladyfingers left over from last week and the authors say are good for at least 10 days and can be served alone or with a butter cream. I chose to make the simplest butter cream mixture with powdered sugar, rum, vanilla extract, and egg yolks. The cream was so rich that I layered only a small amount between two of the cookies in order to stick them together into a small sandwich. I did not think that the butter cream tasted like much other than slightly sweet butter but my guests seemed to like it. I served them with some wonderful fresh cherries.

Ladyfinger cream sandwiches
My friends Brandee and M.E. and her husband Phil joined me for this dinner. Brandee brought the perfect pinot noirs to pair with the richness of the meat. We all agreed that the sauce, as usual, made the dish outstanding and perfectly flavored both the chicken and the rice. M.E. had tasted the ladyfingers in the crème plombières from last week and enjoyed this variation as well, so did Phil who interrupted me mid-sentence to exclaim how good they were. Overall, this was a lovely, hearty meal with good friends and good food.

Saturday, July 20, 2013

Crème Plombières au Chocolat et aux Fraises

When my friend Martha invited a few friends over for a girls’ night, I knew this was going to be the chance to spend a week focusing on desserts exclusively. Wine, games, dancing, ice cream, AND French desserts? What could be more fun?! I selected two variations of crème plombières listed in MAFC, one with chocolate and one with strawberries. The authors describe the dessert as “…a custard filling into which beaten egg whites and a flavoring or fresh fruits are folded. It is spooned over lady fingers or sponge-cake, then chilled.” 

To begin, I followed the recipe for ladyfingers, or biscuits à la cuiller. The batter is comprised of beaten egg yolks, sugar, and vanilla with beaten egg whites and flour folded into it. While this sounds simple enough, a number of steps happened simultaneously and required switching between ingredients several times as the egg whites and sifted flour were incorporated. The batter results in a lovely, airy mixture. The batter was then transferred to a pastry bag and squeezed onto buttered and floured baking sheets. I do not have much experience working with pastry bags and did not have a tip quite as large as the recommended half-inch diameter. While it was a little bit of a messy process, I was able to form the four inch “fingers” without too much hassle. Then, a layer of powdered sugar was applied and they baked for 20 minutes. The little cakes had a light crust and were flakey on the outside but had a tender chewiness to the inside. Due to my novice piping skills, some ended up wider and flatter than they were supposed to be but this may also have been the result of insufficient beating of the components or deflation in the combining process. I thought that I had done a good job of preparing the baking sheets, but a number of the ladyfingers stuck to the pans and crumbled quite a bit when I tried to remove them with a spatula. Not to worry too much as they were still delicate and delicious and were to be covered in cream anyway!

Imperfect looking but perfectly delectable ladyfingers!
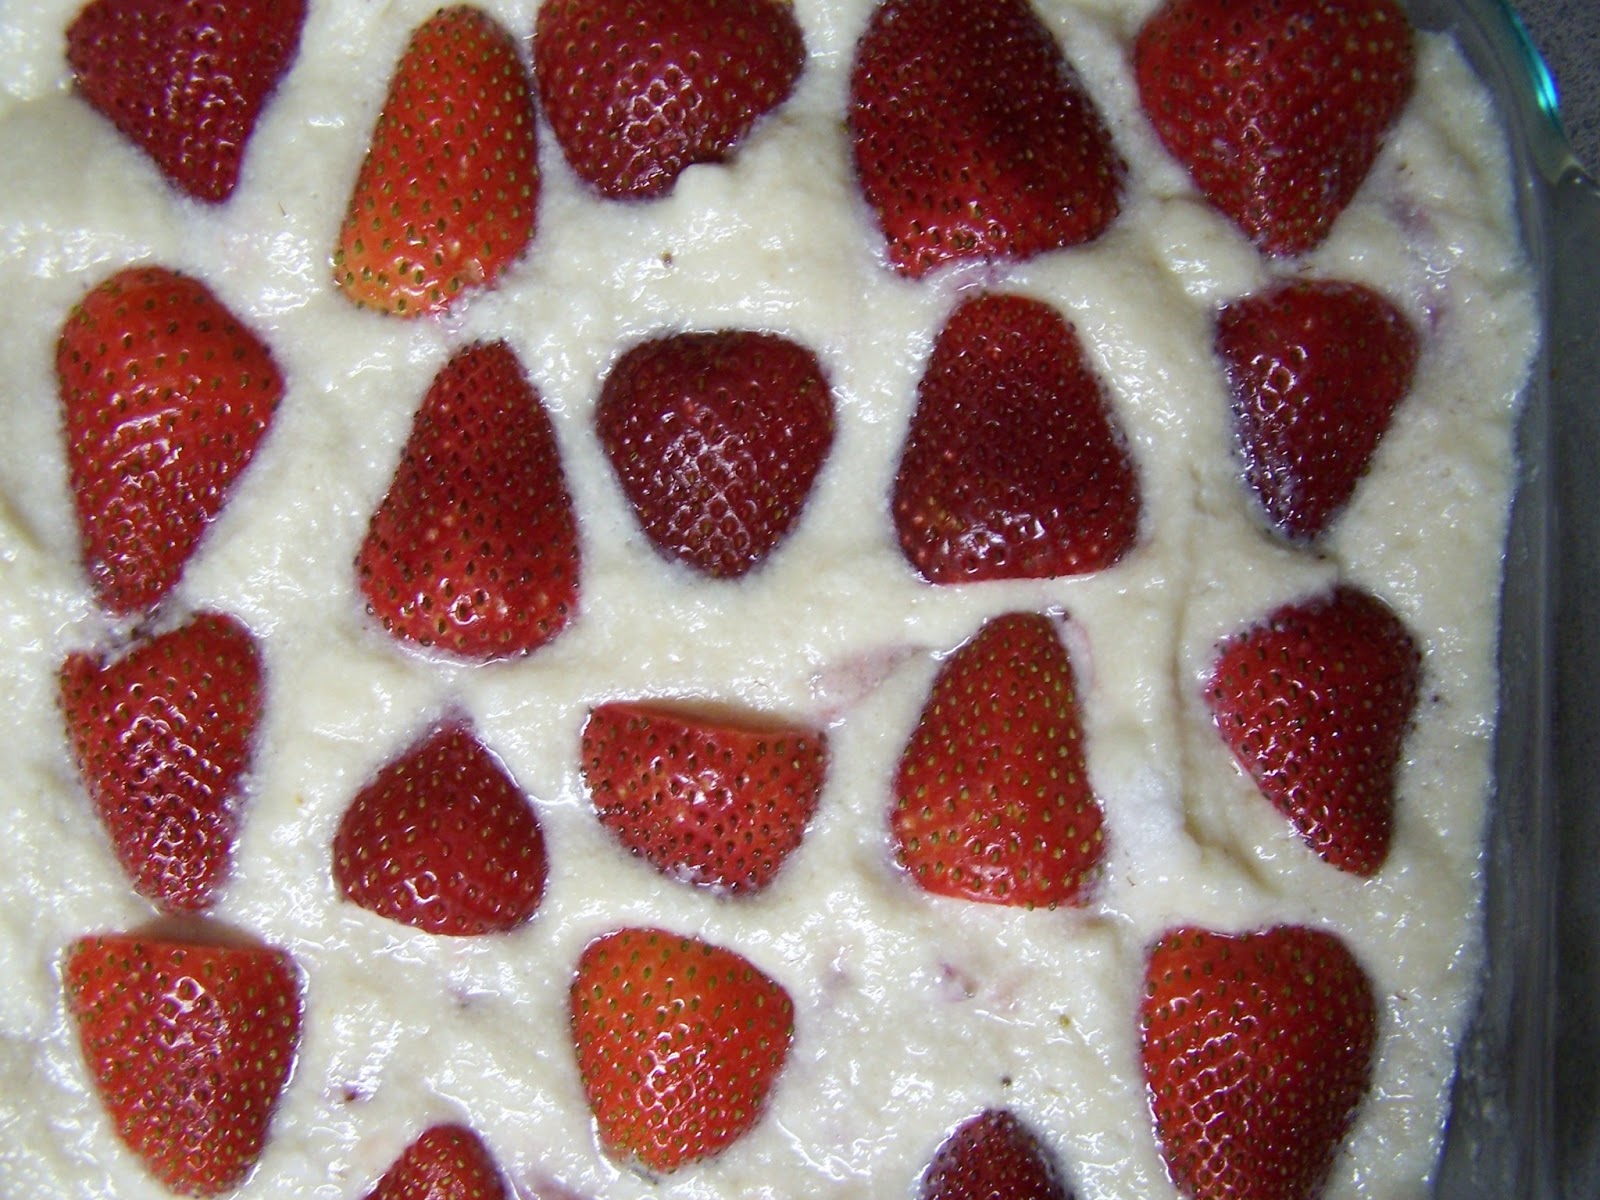
The basic recipe for crème pâtissière was similar to the process for making the ladyfingers (and the mousse recipe from a previous post) by beating egg yolks and whites separately then combining. This time, the yolks and sugar mixture also included a little flour and a couple cups of boiling milk beaten as it was slowly poured into the batter. The cream was then poured into a saucepan and boiled and whisked for a few minutes before adding a bit of rum, vanilla, and butter. Since I was doing two variations, I decided not to double the cream recipe as it sounded like it would produce quite a bit. I’m glad I didn’t as there was plenty of cream for both dishes. I split the batch and added melted chocolate mixed with rum to one and sliced strawberries in sugar to the other. Then beaten egg whites and sugar were folded into each mixture.


The dishes were assembled by lining two serving dishes with ladyfingers. The ladyfingers that would have the chocolate were sprinkled with rum (it was also supposed to have a little coffee but I didn’t have any available) and the ladyfingers to be topped with strawberries were sprinkled with orange liquor (a substitute I had on hand for kirsch or cognac). The dishes were covered with their respective cream mixtures which formed about a one inch layer. Then both were refrigerated for two hours and decorated with shaved chocolate and strawberry slices, respectively.

Crème Plombières au Chocolat


Crème Plombières aux Fraises
The authors warn that if the ladyfingers are not stale, they will become too soggy with the cream on top. Since mine were freshly baked and I did not have time to dry them in the oven as instructed, I had to risk the sogginess. I didn’t mind so much that the cakes took on a little of the moisture; they still maintained their airiness as the cream thickened in the refrigerator. Of the two, I preferred the chocolate in part because it was reminiscent of the mousse from a few weeks ago that I loved so much. Also, the custard with the strawberries did not take on as much of the strawberry flavor as I would have expected, so while the fruit pieces were nice, the cream itself was less impressive. I’m also not sure that the orange liquor was an appropriate substitute for the recommended liquors as it was rather potent. The other girls seemed to enjoy both variations and the extra shot of alcohol helped kick off a truly pleasurable evening. 

Served with vanilla ice cream. YUM!

Unfortunately, all photography this week was done with artificial lighting although the photos seem alright. However, the strawberry decorations did not survive the travel well and sank some. There were extra ladyfingers leftover which the authors of MAFC say are good for at least 10 days, so they may make an appearance at next week’s dinner…


Monday, July 15, 2013

Moules à la Marinière

Happy quatorze juillet!!! The 14th of July marks the French national holiday commemorating the storming of the Bastille, the state prison, which helped ignite the French Revolution. Fun fact: unlike the American Revolution which immediately resulted in a democracy, the French Revolution was followed by three emperors (on four separate occasions) and three kings (also on four separate occasions). All this to say that now the French eat mussels and fries to celebrate – at least those in Bretagne do, I haven’t been able to confirm that this is true for the rest of the country. When I studied abroad in Bretagne, I was introduced to this tradition in full force. I had moules frites, originally a Belgian dish, with my host family about three times during the week leading up to le quatorze juillet. That was fine with me as the coastal region was perfect for mussel eating. At one community event, the mussels were served in one of those red baskets you see here in the States and the fries were shoved in right alongside them. It made me a little less homesick for our county 4H fair food…

Ok, enough reminiscing about the past. Mussels are incredibly fast and easy to cook. The challenge is buying them fresh so they are still alive and clamped shut. The live creature must remain on ice or in fresh water and not be suffocated – not enclosed in a plastic bag. I found the single grocery store in town that carried mussels and went yesterday before the meal to purchase them, and the woman at the seafood counter was wonderfully helpful. The recipe called for 6 quarts of mussels, but when the employee did the calculations this came out to 11 pounds! We decided that the standard half pound per person would be sufficient and I decided to go on the generous side and ordered a little extra. Then, I went directly home and put these little guys on ice immediately. MAFC recommends that two hours before cooking the mussels they should be scrubbed, de-bearded, and soaked in water so that they will “disgorge their sand.” I think this step may be a bit superfluous in the age of fresh-water cultivation but I did it anyway. In fact, I went the extra mile and added flour to the water which is supposed to improve the disgorging process and feed the mussels so they become even fatter.

The current recipe is a simple combination of vermouth, shallots, parsley, bay leaf, thyme, pepper, and butter (halved). All of these ingredients go in a big pot until the alcohol boils. Then throw in the mussels, shake a few times, et voila! Five minutes later they are done. The mussels’ shells should open when cooked but the organism should not cook so long that it becomes tough. These cooked for just the right amount of time and were the perfect texture and the broth was perfectly seasoned.
 
Beautifully opened mussels strewn with sauce
I cheated a tad on the fries and just bought frozen ones from the store. I decided that, since there was no recipe for fries in MAFC, I was off the hook for making them from scratch. I compensated for this shortcut by making homemade mayonnaise (same word in French) for the fries, another loan from the Belgians.  Julia writes: “Mayonnaise like hollandaise is a process of forcing egg yolks to absorb a fatty substance, oil in this case, and to hold it in thick and creamy suspension.” I’ve seen cooks make mayonnaise before but have never tried it myself. The chapter on sauces describes it as one of the easiest sauces to make. It certainly seems easy, really just whisking olive oil into egg yolks with a dash of vinegar, salt, and mustard. The trick is that the oil must be added very slowly and the whisking must be continuous. After almost 15 minutes of hand beating this mixture, I had a very thick, small dollop of mayonnaise. Unfortunately, I found it rather bland and it just tasted like oil and egg yolk. MAFC has a number of variations on this recipe that include adding herbs and other greens such as pickles or capers to the mayonnaise. I may try to perk up this little yellow blob in the coming days but otherwise I have been disenchanted with the results.
 
The bright yellow sauce is the mayonnaise.
French style mustard is on the left and
Hienz Chili sauce is to the front.
My good friend Jacklyn brought a lovely white wine to pair with the seafood and it was very refreshing indeed! We were also joined by our classmate Shweta who brought some lovely little pastries and her almost three-year-old son, Veer. Both the dessert and the boy were very sweet! Veer refused to try the mussels even after I made chomping monster noises with them and his mother said they taste like chicken, but he was content to nibble on the fries. The grown-ups all seemed to agree that the mussels were delicious and the sauce was worth sopping up with some good bread.
 
Wheat baguette recommended for soaking up the sauce
I was a little rushed with the photography this week and wish the plating were more attractive.  Hopefully, you can get a sense of the picnic atmosphere of this spread. One of my favorite aspects of eating mussels is a trick my host father taught me where you use one empty shell to extract the meat from another shell. The French eat finger food in style! 

The spread

Monday, July 8, 2013

Filets de Poisson à la Bretonne and Riz Duxelles

The two dishes I made last night are symbolic of the experiences I had studying abroad in France in two very different parts of the country. The poached white fish with vegetables takes its name from Bretagne, the far northwest region of France called Brittany in English. When I lived in the south of France, I had many dishes that included rice which was surprising to me at the time and I have wanted to replicate some of the French flavors that were added to this basic grain.

MAFC calls for sole for most of the white fish dishes but encourages flounder as an acceptable American substitute. Le boyfriend and I visited several grocery stores in the Minneapolis suburbs trying to find flounder, or at least one of the other listed substitutes in the cookbook. Not having much luck, we decided that tilapia would be the closest fish we could find. I had never poached fish before but it was really quite simple. The fish was placed in a small metal baking dish that had been buttered and layered with green onions on the bottom. More green onions were sprinkled on top and then the fish was dotted with a little butter (less than was called for, of course) and covered in water and white wine. This pan (notice it was metal this time unlike the goose pan disaster in the last post) was placed on the burner and brought to a simmer. The recipe becomes à la Bretonne with the addition of julienned carrots, onion, and celery and sliced mushrooms that have been cooked slowly in butter. The vegetables were placed atop the fish and the pan was covered with wax paper and placed in the oven for about 8 minutes.

Poached fish and vegetables drained of liquid
When the fish came out of the oven, I drained the cooking liquid into small pot and reduced it to almost a cup. The authors instruct to then beat in a paste of butter and flour, some cream, lemon juice, and salt and pepper. This makes a bercy sauce which they describe as “the simplest of white-wine fish sauces.” However simple it may be, this sauce was wonderful! The poached fish and vegetables were then re-covered with the sauce, sprinkled with swiss cheese, and then placed under the broiler for just a few minutes more to make a nice gratiné, or browning on the top.
 
Gratinéed fish - love the lightly browned spots!
A few ingredients in the kitchen
Michael thought the fish tasted fine but I thought it was a little bland. We both agreed that the sauce was fantastic and had such a unique flavor of tartness from the wine and lemon and richness from the cream. The vegetables were also delicately cooked to the point of melting in your mouth.

The rice was not much trouble and turned out to be the perfect side to the fish and delicious with the sauce. I’ve always had difficulty making rice as it often becomes mushy or overcooked. The authors of MAFC recommend the following steps for “foolproof” steamed rice. First, the rice, water, and salt are placed in the saucepan and brought to a boil. They indicate that the rice should only be stirred once and then brought to a simmer, covered, and cooked for only 12 minutes more. My rice still became slightly starchy but it was perfectly al dente with this method. Then, I simply added diced mushrooms that had been squeezed in a cloth to remove moisture and sautéed in butter with some green onions. The rice was then seasoned with a little salt, pepper, and parsley. All done!

 
Rice with garnish
Plated meal

Look at that beautiful sauce!

Overall, this was one of the simpler meals I’ve done so far and it was every bit as delicious as the others. We had a little side salad of mixed greens and drank the rest of the Belle Sera pino grigio that had been used to poach the fish, which had a wonderful flavor to it that was not too dry. We started watching Band of Brothers last night and found it quite appropriate to see a show about the invasion of Normandy while eating French food! More French history next week…


Sunday, June 30, 2013

Oie Rôtie aux Pruneaux

Roasting a goose sounded like quite an adventure, especially considering I’ve never even eaten goose before! I love duck and truly wanted to cook a duck instead, but they were nowhere to be found at any of my local grocery stores, so goose it was. This recipe calls for the goose to be stuffed with prunes that have been stuffed with foie gras. First, the prunes are soaked in vermouth and bouillon and then the liquid is reserved for the sauce. Since I was unable to find liver paste, foie gras, at the grocery store, I simply sautéed the goose liver with shallots and skipped the step of blending it with the liver paste. The liver was then stuffed into the prunes.

The most difficult part of roasting the goose was defrosting it. I was on a short timeline and placed the bird under cold running water for about four hours. I could tell as soon as I opened the package that this was going to be a greasy adventure. Geese have a lot of fat on them including a thick layer of subcutaneous fat. Once the bird was defrosted enough to extract the neck and innards, I cut out as much of the extra fat as possible from around the openings. The cavity of the goose was really quite large and the 40 or so prunes only lined the bottom. The recipe then instructs that the bird be trussed much like the whole chicken from a prior post. I felt quite efficacious completing this step from memory, especially since the needle was much more slippery given oily goose. Unlike the chicken, MAFC instructs the cook to prick the skin all over the goose before drying it and placing it in the roasting pan. There is no explanation for this step, but my guess is that it has something to do with helping to dissolve the layer of fat under the skin during basting. The authors also instruct basting with boiling water instead of with the juices from the bird to help with the dissolution of the fat. In fact, the excess fat that accumulates in the pan during roasting should be suctioned out with a bulb baster and discarded. There was so much fat that I filled two empty olive jars!

The goose was roasted in the pan for about two and a half hours with basting every 15 minutes and turning the goose to a new side every once in a while. After the bird finished cooking and was moved to a platter, the rest of the fat was extracted from the pan leaving the brown roasting juices. The next step is where I made my first major mistake of this blog. The instructions indicate that the pan should be placed on the stove, the prune juices added, and the mixture brought to a boil. However, I do not have a metal roasting pan and had been using a ceramic lasagna dish which immediately cracked when placed on the hot burner. I was able to salvage the juices in a sauce pan, but the dish had to be discarded. I knew better than to put that dish on the hot stove, but in my hurry and focus on the literal instructions of the recipe, I ignored my common sense. Anyway, the sauce finished boiling down in the pot with some additional port wine and butter. Quite delicious!

Whole 9lb goose!

The wings do not have much meat


Never much of a bird carver (see previous post about quartering a raw chicken), slicing the meat was one of the most challenging aspects of this meal.  In my defense, the ligaments were quite tight and taking off the legs was rather difficult. Somewhat as expected, the goose tasted like duck but slightly tougher and oilier. The prunes were an excellent paring with the meat.

To accompany the goose, I made frozen peas – a dish I did not expect in such a fine French cookbook! The peas were simply thawed and boiled in a pot with a little butter, shallots, chicken stock, and salt and pepper. The result was sweet and savory.


I also made Julia’s recipe for Purée de Pommes de Terre à l’Ail, or garlic mashed potatoes. I’ve made garlic mashed potatoes numerous times as it is one of my all-time favorite dishes. Usually, I roast the whole head (or two) of garlic in olive oil in the oven and then extract the cloves, a process which gives them a rich flavor. MAFC offered a different technique. The authors instruct the cook to separate the garlic cloves (two heads worth), boil them in water for a couple minutes, and then peel them and cook the cloves in butter on low heat for about 20 minutes. Flour is then added to the cooked garlic until it “froths with the butter” and then boiling milk is beaten into the mixture. The recipe suggests blending the garlic and milk or pressing it through a sieve, but I felt my fork mashing was sufficient to break apart the garlic.
 
Mashed potatoes with bits of parsley
I must admit that I became a little lazy with the boiled potato portion of this recipe. After the quartered potatoes boiled down, I was supposed to put the potatoes through a ricer, beat the purée over moderate heat for a few minutes, and then beat in more butter, salt, and pepper. I understand that the reason for beating the potatoes over heat once they've been mashed is to evaporate the water left in them, but I've learned from other cooks that simply placing the potatoes back in the hot pot after they have been drained and mashing them on the turned off burner works just as well. So, that’s what I did. Finally, the garlic sauce was mixed into the potatoes along with some parsley before serving. The recipe also called for adding cream to the potatoes, but since I did not have any on hand, a little butter and milk was substituted. This recipe involved more modifications to the MAFC instructions than I usually like to make, but I’m so stuck in my own ways of making garlic mashed potatoes that I felt like taking a number of liberties. I don’t think these potatoes had quite as much flavor as I would have expected, perhaps because of the way the garlic was prepared, or it may have been due to the lack of cream. Regardless, the goose gravy certainly helped compensate for any blandness.

The whole meal!
Plated with prunes
My friends Jennifer, Jason, and Xinying joined me to help consume this 9lb goose. Jennifer and Jason went to great lengths to find plum wine to accompany the meal. I have never been a huge fan of sweet wines but this wine was perfectly delicious and well paired with the goose and prunes. We finished the meal with a serving of moose tracks ice cream – distinctively not French but one of my favorites. We had a wonderful time with this meal and as you may expect from three psychology graduate students and a prosecuting attorney, the conversation often turned to issues related to the practice of forensic psychology. Also, the DSM 5 may or may not have made an appearance at the table to discuss nuances of the changes made to our diagnostic system of mental illnesses…

We ate a good amount of the bird for dinner, but the next day I was able to extract even more meat from the crevices of the goose. With the leftover meat (after I had my fill of nibbling), I made a modified version of cassoulet, a bean and meat stew from the south of France. I first tasted this dish on a day trip to Toulouse when I was studying in Montpellier. A friend and I made the trip and spent the day wandering the city just to wait for dinner time when we could try the duck and cassoulet famous to that town.  The version in MAFC is much more complicated than I was prepared for and included bacon fat (I don’t eat pork products). So, I simply cooked down some onions, carrot, and garlic and then simmered the mixture in white wine and vegetable stock. Then, I added canned white beans and the goose and seasoned with thyme. I ate a little of the result, but saved most of it in the freezer for later. I can’t wait for an occasion to eat the leftovers – the cassoulet turned out to be the perfect warm, hearty dish I love!

I'm afraid cassoulet does not look as attractive as it tastes

Due to a later dinner, I was forced to rely on artificial light this week for the photographs. As previously mentioned, I find poultry difficult to photograph well and this bird did not brown evenly on the back (but I assure you it was fully cooked) making it look even less attractive. Next week I’m back to the land of lakes!

Sunday, June 23, 2013

Poulets Grillés à la Diable, Salade Niçoise, and Mousseline au Chocolat

In French, diable means “devil,” but I’ve also heard that à la diable means “any which way.” Regardless, this dish was devilishly good. The recipe calls for a small chicken quartered. The chicken ended up in four pieces, but one future goal of mine is to discover a more graceful way of dismembering a whole chicken… The chicken pieces were first broiled and basted with butter for ten minutes on each side. Then, a lovely slathering of a mustard dip comprised of Dijon, shallots, herbs, pepper, and the basting fat was applied to each side of the chicken and the pieces were rolled in bread crumbs. The recipe calls for fresh bread crumbs, but I’m always looking for ways to using my left over matzo meal from Passover. I was afraid that the stale matzo crumbs (or maybe they just tasted stale because it is matzo – it’s often hard to tell) would dry the chicken, but this was absolutely not the case. Another 20 minutes under a low broil and basting every few minutes, and the chicken was finished. Compared to the whole roasted chicken I prepared a few weeks ago, this recipe was very easy and efficient. The meat was incredibly juicy and tender and the extra mustard made an excellent dipping sauce. Julia and the other authors of MAFC emphasize that this dish is flexible as it can be prepared ahead of time or eaten cold.
Poulets Grillés à la Diable
I only spent about three hours in Nice one time between trains on the way to Italy, so I have no idea what a true salad in Nice is like. I’ve had Salade Niçoise once or twice in the U.S. and love this chunky alternative to most American salads. In theory, it looks like a simple dish with large pieces of a few vegetables, some tuna, and olives strewn atop, but there are several steps and cooking techniques used in this preparation so it took some time. The recipe from MAFC calls for boiled potatoes which are sliced and layered at the bottom of the serving dish and drizzled with a vermouth and stock mixture until the liquid is absorbed. Then the potatoes are seasoned with a vinegar, mustard, and oil dressing and topped with parsley. The potato dish at this point constitutes Julia’s Pommes de Terre à l’Huile (French potato salad). The Niçoise salad requires the arrangement of Boston lettuce leaves around the outside of the bowl and following on top of the potatoes: blanched green beans, large slices of tomatoes, and two boiled eggs quartered. The recipe gains its Mediterranean flair with chunks of canned tuna, olives (I used kalamata olives), and anchovies. I knew my guests were not terribly fond of anchovies so those were served on the side. Finally, the whole salad got another sprinkle of vinaigrette with herbs (I had some fresh basil from my garden). The resulting salad is heaping and attractive with many layers and colors. While there are a number of steps that go into this salad, the most difficult part was trying to serve it from the bowl without completely falling apart! As an avid salad eater, this is absolutely a dish I will make again in the future.

The potatoes are at the bottom I promise!

You can see the anchovies on the salad and mustard sauce at the back.

While the chicken and salad were excellent, the real tour de force for this week was the Mousseline au Chocolat. A number of years ago, I had dinner at with a friend at his grandmother’s house and she made chocolate mousse served from martini glasses. I thought this was such a classy and creative idea that I have wanted to try it ever since. Because the recipe calls for refrigeration for several hours, I made the dish the night before, which was a good idea because it was quite a process. The most difficult aspect of this dish was that I did not have the correct kitchen equipment for some of the steps and had to improvise a bit. For instance, metal bowls would have been preferable for melting the chocolate and heating the egg yolks, but I had to substitute glass and a large ceramic bowl for a few steps.

Equipment aside, first egg yolks, sugar, and orange liqueur are beaten together until pale yellow and thickened. I then continued to beat the eggs over a pan of simmering water until it becomes foamy and hot. Then, it is beaten over cold water until it is cooled and thickened to mayonnaise consistency. Next, the recipe calls for semi-sweet baking chocolate to be melted with a few table spoons of coffee over a double boiler. The authors call for a stick and half of butter to be melted with the chocolate, but I made the decision to use a third of the recommended amount and the final product was still perfectly rich and creamy. As a side note, I love how shiny chocolate becomes with the addition of butter! After the chocolate is mixed with the egg yolks, the third step is to beat together egg whites and sugar until stiff peaks are formed. The whites are then gently folded into the rest of the batter to create the fluffy mousse consistency. I also love the light squishing sound that egg yolks make when they are folded! Finally, I plated the mousse into martini glasses and refrigerated overnight. To serve, I beat some whipped cream with a dash of vanilla extract and placed a dollop on each dessert.


My friends Rachel and Jaime joined me for this meal. Rachel brought strawberries which were a lovely accompaniment to the mousse (see below). We decided that the mousse was extraordinary and perhaps better than many other pleasures.  Each of these dishes was fabulous individually and will definitely make reappearances in my kitchen in the future.  


In regards to the photography, an earlier dinner was conducive to more natural light, but I still think I need to invest in a tripod. I've decided that of the food I've made so far chicken is the most difficult to photograph and make it look attractive. Something about brown lumps that just don't show up well in pictures. 

Be prepared for more poultry next week!


Sunday, June 16, 2013

Quiches

Butter, and shortening, and cream, oh my! This week I ventured into the baking realm of French cooking with two variations on quiche. The process began with two batches of pâte brisée, a basic pastry dough and pie crust. I've mentioned previously that I decided not to have any qualms about reducing the amount of fat that most of these dishes require, but I've learned that with baking one should always follow the recipe - at least the first time. Six ounces of butter and four tablespoons of shortening per crust later, my dough was ready. MAFC describes a process called fraisage which is a final blending of the dough by pressing through the dough on a flat surface to stretch it out and blend the fat and flour thoroughly. The authors describe this as a process rarely used by American cooks but a technique that distinguishes the French pastry. As with any pastry dough, the instructions emphasize working quickly and keeping the ingredients chilled to maintain lightness.

After refrigerating the dough overnight, I rolled it into a large circle with the method described in the cookbook. I have always had trouble maintaining an even consistency with rolled dough, so the instructions in MAFC were enlightening. The authors instruct flouring the work surface and rolling the dough with strokes away from you to about one inch from the far edge and turning the dough between strokes. Thus, one roll away, turn the dough 90 degrees, one roll away, turn 90 degrees... I repeated this process roughly 30 times to reach the size dough I needed to fill the pans and more flour was added occasionally to the underside to prevent sticking. Another challenge I've always faced with dough is transferring it from the counter to the pie dish. The instructions indicated the method with which I was most familiar, flipping part of the dough onto the rolling pin to lift it, and a new idea, folding the dough into fourths before laying it on the mold and unfolding it. I tried both and must say the folding was much easier to manage. Glad to learn something so useful!! Regarding the molds, Julia recommends straight edge pans with removable sides as this keeps the edges vertical and less liable to collapse. I only have one spring-form pan so one quiche was made in that dish and the other in a regular pie pan. Both required a quick pre-bake with a lining filled with beans to prevent rising of the center of the crust.

One aspect of French cooking that I've noticed differs greatly from American cooking is emphasis on fewer main components of a dish. For example, in the U.S. I've seen many quiches that have broccoli, potato, bacon, onion, and mounds of cheese all in one pie. On the contrary, French quiches emphasize one vegetable at a time and minimal cheese. The same concept is true for Americanized versions of paninis, omelettes, and crêpes - we like to stuff our food with everything at once! The quiche recipes in MAFC range from cheese only to perhaps three main ingredients. I chose quiche aux poireaux (leek quiche) and quiche aux fruits de mer (seafood quiche - any shellfish was recommended and I chose shrimp for my version because I had some on hand). For the leek quiche, the leeks were boiled for over 30 minutes in a tiny bit of water and butter; however, they turned out a little tough and probably could have used more time. The vegetable was mixed with a combination of cream, eggs, and topped with a little Swiss cheese in the dish. The seafood quiche had shallots and shrimp sautéed in a dab butter (finally a place I was able to reduce the quantity!) and deglazed with vermouth. In addition to the cream, eggs, and Swiss cheese, this recipe also called for some tomato paste. I was a little wary of the shellfish quiche as I had never heard of it and tomato paste sounded like an odd component - but it turned out to be our favorite!

Leek quiche in the spring-form pan

Look at those straight sides!

Shrimp quiche
 The sides of both shells shrank during the pre-baking phase and I'm not entirely sure why. My ideas are 1) the thickness of the dough was uneven, 2) the dishes were buttered too well in areas, and 3) there was too much butter in the crust that it did not harden well enough.

Gooey layers of quiche!
I thought the quiches were quite creamy and I would consider using a less fattening milk next time. The crust was also rather buttery and would likely turn out just as flaky with less fat.

Nestled together.
 In addition to the quiches, I also made a light salad to cleanse the palate between bites. It was simply chopped romaine with a vinaigrette of olive oil, balsamic, and Dijon I learned while living in France. The lettuce was certainly needed to cut the richness of the pastry and creaminess of the filling!

Fresh Alabama peaches!
This week's meal was my first Sunday luncheon and I was joined by my friends Lisa, Morgan, and Bryan. We finished with some fresh Chilton County peaches to accompany the remaining drops of mimosas (not pictured because we drank them eagerly!). After lunch, we played a round of Settlers of Catan, a complex game similar to Monopoly but much more suspenseful. The game quickly dissolved into fascination with building architectural structures with the playing pieces... but I won the real game! The daytime meal also meant that I could optimize on the natural sunlight for my photography which I think made a big difference. I especially like the first photograph - mysterious leek quiche... All in all we had a lovely afternoon with some new dishes and friendly competition.

In other news, I also made some juice pops this week with lemonade and fresh slices of strawberries. I had never added fruit to my frozen juice before and I was so glad that they didn't all sink to the bottom. Great afternoon snack on these hot Tuscaloosa days! And pretty too!

Suspended strawberries